In Queensland, adopting stand-alone solar power systems presents a compelling opportunity to achieve energy independence and sustainability. Stand Alone Solar Systems QLD are designed to operate off-grid, providing reliable electricity even in remote locations. By harnessing solar energy, individuals can significantly reduce their reliance on conventional power sources, contributing to environmental conservation. The installation process, while complex, can be managed effectively with proper planning and understanding of the necessary steps. This guide simplifies the process by breaking down each installation stage, from evaluating energy needs to ensuring optimal performance. Such an approach ensures that users can make the most of Queensland’s abundant solar resources.
Step 1: Evaluating Energy Requirements
Understanding energy consumption is fundamental in selecting a suitable stand-alone solar power system in Queensland. Accurately determining energy needs involves using tools like energy monitoring devices and consumption calculators, which provide detailed insights into usage patterns. These insights help you choose a system that matches the specific energy requirements.
The daily, weekly, and monthly energy usage data gathered through these tools enable a precise estimation of the necessary system capacity. This ensures the selected solar power system can meet the household’s or business’s demands, preventing issues such as undersizing or oversizing, which could impact performance and cost-effectiveness.
Step 2: Selecting Appropriate Stand Alone Solar Power Systems Queensland
Queensland’s climate presents unique challenges when selecting a standalone solar power system. With high temperatures and occasional extreme weather conditions, it is important to choose a system that can withstand the elements while maintaining optimal efficiency. A carefully selected solar power system will ensure reliable energy production and provide long-term sustainability for households and businesses across the state.
Consider the Efficiency of Solar Panels in Queensland’s Heat
High temperatures can impact solar panels, reducing their efficiency. Selecting panels specifically designed to perform well under hot conditions is crucial. Many of the latest models come with advanced technologies that help mitigate temperature-induced performance loss. Researching panels with low-temperature coefficients can help improve energy production during Queensland’s hot summers.
Durability of Components in Queensland’s Weather Conditions
Durability is a crucial factor when selecting solar systems. Queensland is known for its extreme weather, including strong winds and intense sun exposure. Choosing components like inverters, batteries, and mounting Stand Alone Solar Power Systems Queensland that are built to withstand these conditions is essential. Consulting with solar experts can help identify the best systems with long-term performance and durability.
Maximising Solar Benefits with Expert Advice
To ensure the system is best suited to specific energy needs, it is recommended to seek advice from solar energy experts. These professionals can evaluate the household’s energy consumption, budget constraints, and environmental conditions to recommend the optimal system. Additionally, staying updated with the latest advancements in solar technology can further improve the efficiency and longevity of the chosen system, ensuring that it provides reliable energy for years to come.
Step 3: Planning for Installation
Before starting the installation, securing all necessary permits and complying with local regulations in Queensland is essential. Consulting with local authorities helps understand specific requirements, ensuring the installation meets legal standards. Engaging with professionals for a detailed site assessment is crucial, as they can evaluate factors such as sunlight exposure, structural integrity, and potential shading issues.
This assessment helps create a comprehensive installation plan, optimising the system’s performance. Developing a timeline for the installation process, including ordering components and scheduling work, also ensures a smooth workflow. Effective planning mitigates risks and addresses potential challenges, paving the way for Queensland’s successful and compliant installation of stand-alone solar power systems.
Step 4: Comprehending Components of Standalone Solar Systems
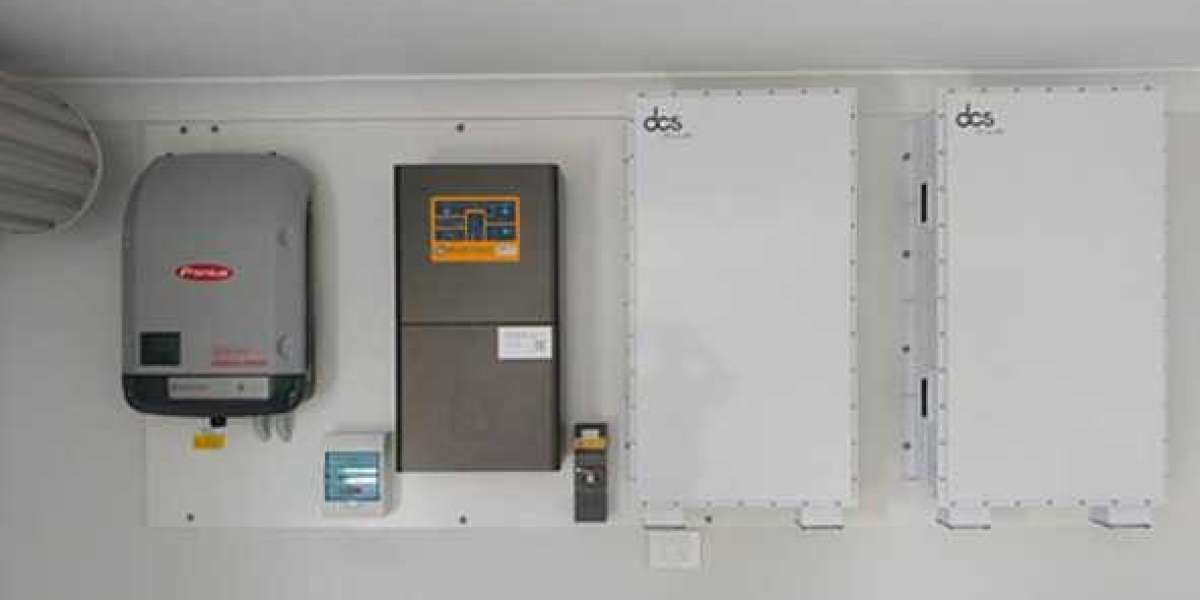
A stand-alone solar system in Queensland includes several essential components that work together to generate and store energy. These systems typically consist of solar panels that capture sunlight. This inverter converts direct current (DC) to alternating current (AC), battery storage for excess energy, and a charge controller to regulate the battery’s charging and discharging processes.
Each component is critical in ensuring the system functions efficiently and reliably. For instance, solar panels must be selected based on efficiency and durability, while inverters should match the system’s capacity. Proper battery storage solutions are vital for maintaining energy availability during non-sunny periods. Understanding these components helps manage and optimise the overall system.
Step 5: Choosing the Ideal Installation Site for Stand Alone Power Systems Australia
The location of solar panels plays a crucial role in determining the efficiency and performance of a solar power system. In Queensland, where sunlight is abundant, selecting the right spot can ensure maximum energy production and long-term benefits.
Optimal Roof Orientation and Tilt
North-facing roofs are generally considered the best location for solar panels in Queensland, as they capture the most sunlight throughout the day. This orientation ensures the panels receive direct sunlight for much of the day, maximising energy generation. Additionally, the tilt of the roof plays a role in determining the angle at which sunlight hits the panels. A proper tilt can significantly improve energy capture, particularly during the peak sun hours.
Avoiding Shading and Obstructions
Shading from trees, nearby buildings, or other obstructions can drastically reduce the efficiency of solar panels. Even partial shading can cause substantial energy loss, as the panels work less effectively when they receive inconsistent sunlight. During the site assessment, it’s essential to identify and eliminate any potential sources of shading to ensure that the panels receive maximum exposure.
Roof Integrity and Accessibility
Before installation, it’s essential to evaluate the roof’s structural integrity. Solar panels are heavy, and the roof must support their weight without compromising safety. Additionally, easy access to the roof for maintenance purposes is critical. Regular cleaning and inspection are necessary to maintain optimal system performance, so ensuring safe, easy access can save time and effort in the future.
Ensuring Long-Term Performance
By carefully considering roof orientation, shading, structural integrity, and maintenance access, homeowners can select the ideal location for their solar panels. This ensures that the Stand Alone Power Systems Australia deliver reliable performance and maximises energy efficiency over its lifespan.
Step 6: Mounting the Solar Panels
Mounting solar panels involves a systematic process to ensure both safety and efficiency. The first step is securing brackets to the chosen surface, such as a roof or a ground mount, to hold the panels in place. These brackets are usually made of durable materials to withstand harsh weather conditions like heavy winds and rain. Once the brackets are securely fastened, the solar panels are carefully positioned and mounted onto these supports.
Correct Alignment and Panel Positioning
The alignment of the panels is a critical step in the installation process. To optimise sunlight exposure, panels must be positioned at the correct angle and orientation, typically facing north in Queensland to receive maximum sun throughout the day. The installation team ensures the panels are adequately aligned to capture the most sunlight, directly impacting energy production.
Ensuring Secure Fixation
It’s vital to secure the panels firmly to the mounts, as they need to withstand various weather conditions, including high winds and storms. Proper fixation prevents damage and ensures the system’s longevity.
Safety Protocols and Attention to Detail
Safety protocols must be followed throughout the installation to prevent accidents. Additionally, installers must check for any potential shading from nearby trees or structures that could affect the panels’ performance. By ensuring correct positioning, secure mounting, and adherence to safety standards, the solar panels will function efficiently, contributing to the overall performance and longevity of the solar power system in Queensland.
Step 7: Install the Charge Controller
The charge controller plays a crucial role in managing the flow of electricity from the solar panels to the battery storage system. It prevents the batteries from being overcharged, which could lead to damage or reduced lifespan. By regulating the voltage and current, the charge controller ensures the batteries are charged within safe limits, maximizing their efficiency and longevity.
When selecting a charge controller, choosing one compatible with the system’s voltage and capacity is essential. The controller should be installed in a dry, well-ventilated area easily accessible for future maintenance. Ideally, it should be located near the battery storage but not directly on top of or too close to it. Ensure the wiring follows the manufacturer’s guidelines and all safety precautions are followed.
An easily accessible location will allow troubleshooting, adjustments, and system performance monitoring as needed. The charge controller should also be securely mounted to prevent it from shifting or becoming disconnected over time. Once the controller is installed, check that it is correctly connected to the solar panels and the battery storage system to ensure effective operation.
Step 8: Set Up the Battery Storage System
The battery storage system stores the energy the solar panels generate for later use, making it an essential component in a stand-alone solar system. When setting up the batteries, placing them in a cool, dry, and well-ventilated location is necessary. Extreme temperatures can reduce battery efficiency and lifespan, so avoid placing batteries in areas with fluctuating heat or humidity. Please put them in a dedicated space, such as a shed or garage, where they will be protected from the elements.
Ensure the batteries are elevated off the floor to protect them from potential moisture damage. Proper ventilation is critical, as batteries release gases during charging, which need to be safely vented. Follow the manufacturer’s instructions carefully when wiring the batteries, ensuring the connections are secure and well-insulated to prevent accidental short circuits. Additionally, battery storage systems should be regularly checked for signs of wear and corrosion, particularly around the terminals.
A well-installed and maintained battery storage system will help maximize the storage capacity and reliability of your stand-alone solar power system, providing you with consistent energy availability even when the sun isn’t shining.
Step 9: Install the Inverter
The inverter is a vital part of a stand-alone solar power system, as it converts the DC (direct current) electricity generated by the solar panels into AC (alternating current) electricity, which is compatible with most household appliances. When installing the inverter, choose a location that is well-ventilated and protected from extreme weather conditions, such as an indoor utility room or a shaded outdoor area with adequate airflow. The inverter must be mounted securely on a stable surface to prevent damage or shifting.
Ideally, the inverter should be placed close to the electrical panel to minimize the length of wiring, which can help reduce energy losses. Proper grounding is also essential for safety, so ensure the inverter is correctly grounded according to the manufacturer’s guidelines. Be mindful of local regulations, as certain areas may require professional installation or inspection of the inverter.
Once installed, connect the inverter to the battery storage system and the electrical panel. Testing the inverter’s operation is crucial to verify that it is converting DC power to AC and that the system is functioning as expected. Regular maintenance and monitoring of the inverter’s performance can prevent issues and ensure the system operates efficiently.
Step 10: Connect the Components of Stand Alone Solar Power Systems NSW
At this stage, all the main components of the Stand Alone Solar Power Systems NSW —solar panels, charge controller, battery storage, and inverter—should be installed and ready for connection. This step involves wiring the system components to ensure they work harmoniously. A licensed electrician should always do wiring to guarantee the system meets safety standards and local electrical codes.
When connecting the components, ensure that all connections are tight and properly insulated to prevent energy loss and electrical hazards. Start by connecting the solar panels to the charge controller, then link the charge controller to the battery storage system. The inverter should then be connected to the battery storage system and the electrical panel to distribute the AC power to your appliances.
Following the manufacturer’s instructions for each component during installation and wiring is essential to avoid damaging parts or compromising system performance. After everything is connected, check that the system is wired correctly and securely. A thorough system test should be conducted to verify that the power flows appropriately from the solar panels to the batteries and that the inverter is converting the DC power to usable AC power. Testing ensures everything is working as it should before you begin regular use.
Step 11: Conduct System Testing and Monitor Performance
Once all components are installed and connected, it’s time to test the entire solar system to ensure everything is functioning correctly. The system should be tested to verify that the solar panels are generating power, the charge controller regulates the charge to the batteries, and the inverter appropriately converts DC electricity to AC. Start by checking the solar panel output to ensure they receive sunlight and generate electricity.
Then, verify that the charge controller regulates the power flow, providing the batteries are charging but not overcharging. The inverter should be tested by connecting a small load, such as a light or appliance, to ensure it correctly converts DC to AC power and supplies electricity to your home. A monitoring system is helpful at this stage to track the system’s performance over time.
Many solar systems now include remote monitoring, allowing users to view their panels’ status, charge levels, and overall efficiency via a mobile app or web dashboard. Monitoring can help detect issues early, allowing you to take corrective actions before they become significant problems. Regular testing and monitoring will ensure the system’s optimal performance and longevity.
Step 12: Maintain Your Stand-Alone Solar System
Maintenance is crucial for running your stand-alone solar system smoothly and ensuring longevity. Solar systems are relatively low-maintenance, but periodic checks and cleaning can help maintain optimal performance. Start by regularly cleaning the solar panels to remove dirt, dust, and debris that may obstruct sunlight. Depending on your location, this may need to be done several times a year, mainly if you live in an area with frequent dust or pollen.
Check the battery terminals for corrosion or wear for the battery storage system and regularly test the batteries’ charge capacity to ensure they hold power. Ensure the batteries remain in a relaxed, dry environment and are well-ventilated. The inverter should be checked for error codes or performance issues, and the system should not overheat. Some inverters come with self-diagnostics, which makes this easier.
Regularly inspect the wiring for wear or loose connections and ensure all system components function as expected. Finally, consider setting up a regular professional inspection, especially for the more complex electrical components. Maintaining the system ensures it runs efficiently, prolongs its lifespan, and helps you avoid costly repairs.
Conclusion
Setting up Stand Alone Solar Systems QLD requires careful planning, selecting appropriate components, and ensuring the system is installed according to safety and regulatory standards. Following these step-by-step instructions, you can create a sustainable and reliable solar power system that helps reduce your reliance on the grid and lowers energy bills. Always consult with licensed professionals for electrical work and ensure your installation meets local regulations. With regular maintenance and system monitoring, you can enjoy the benefits of a fully functioning solar system for years.
FAQ’s
Here are 5 frequently asked questions (FAQs) for your blog post about installing a stand-alone solar power system in Queensland:
1. What is Stand Alone Solar Systems QLD and how do they work?
Stand Alone Solar Systems QLD are designed to operate off-grid, providing electricity to homes or businesses without relying on the local power grid. The system consists of solar panels, a charge controller, battery storage, and an inverter. Solar panels capture sunlight and convert it into direct current (DC), which is then stored in the batteries. The inverter converts the stored DC power into alternating current (AC), which is used to power appliances and devices.
2. How do I determine the size of the solar power system I need?
To determine the right system size, you need to evaluate your energy usage. This includes reviewing past electricity bills to understand your daily, weekly, and monthly consumption. Tools like energy consumption calculators or consulting with a solar expert can help you estimate the appropriate capacity for your needs. A properly sized system ensures efficient performance and cost-effectiveness.
3. What are the ideal conditions for installing a solar power system in Queensland?
Queensland’s abundant sunlight makes it an ideal location for solar energy. To maximize energy production, solar panels should be installed on a north-facing roof with a suitable tilt angle. Additionally, avoid shading from trees, nearby buildings, or other obstructions that could reduce panel efficiency. Proper roof integrity and easy access for maintenance are also key factors in ensuring optimal system performance.
4. What are the key components of a stand-alone solar Stand Alone Solar Power Systems Queensland system?
Stand Alone Solar Power Systems Queensland typically include solar panels, a charge controller, battery storage, and an inverter. The solar panels capture sunlight, the charge controller manages the flow of electricity into the batteries, the batteries store excess power, and the inverter converts DC electricity into AC for use by appliances. Each component plays a vital role in ensuring reliable and efficient operation of the system.
5. How do I maintain my stand-alone solar power system?
Regular maintenance is essential to keep your solar power system running smoothly. This includes cleaning the solar panels to remove dust and debris, checking battery terminals for corrosion, and monitoring the performance of the inverter. Ensure the batteries are stored in a cool, dry, and ventilated space, and inspect the wiring for any wear or loose connections. Regular testing and monitoring can help identify potential issues before they affect system performance.
| Related Business Listings |
| Contact Directory |
| Local Business Profiles |